How to Clean a Dryer Vent: A Complete Guide
Cleaning your dryer vent reduces fire risk, cuts drying time, and lowers energy bills. Here is a straightforward method that works for any dryer setup.
The core of dryer vent cleaning is straightforward: disconnect the duct from the back of the dryer, vacuum out the lint that has accumulated inside the duct and around the exhaust port, clean the exterior vent cover, then reconnect everything securely. That single task removes the main fire hazard and restores the airflow that determines how efficiently your dryer operates.
Learning how to clean a dryer vent is one of the more consequential maintenance jobs a dryer owner can do. Lint is highly flammable and accumulates with every load. A restricted vent forces the dryer to run hotter and longer to accomplish the same drying, raising electricity or gas costs and wearing components faster. The U.S. Fire Administration cites failure to clean the dryer as the leading cause of dryer fires. Annual cleaning addresses all of it.
Products mentioned in this post


Why You Need to Clean Your Dryer Vent
Lint exits the drum through the filter, but fine fibers pass through and accumulate inside the duct over time. As the layer builds, it narrows the duct's effective diameter and restricts airflow. The dryer responds by running longer and hotter to compensate, which increases energy consumption and stresses the heating element. If lint contacts the heating element or accumulates near the exhaust point, it can ignite. A blocked vent also pushes humid exhaust air back into the laundry area when it cannot exit the building properly, contributing to elevated indoor humidity and potential mold growth around the vent connection.
Tools You Will Need
The basic toolkit is inexpensive and effective for most residential setups. You need a vacuum with a crevice attachment, a dryer vent brush kit with flexible rods and a round brush head sized for your duct diameter, and a screwdriver or nut driver to loosen the duct clamp. A flashlight helps you see inside the duct and exhaust port clearly. Work gloves protect your hands from sharp sheet-metal edges inside the duct connection. For long or winding duct runs, a leaf blower directed from the exterior vent opening can dislodge stubborn compacted lint that the brush cannot reach from the inside. Compact dryers like the Magic Chef MCSDRY1S or the Costway VD-23598EP have shorter duct runs that the basic toolkit handles without difficulty.
Step 1: Unplug the Dryer and Disconnect the Duct
Pull the dryer away from the wall far enough to access the back panel and the duct connection. Unplug the power cord or, for a gas dryer, turn off the gas valve. Locate the duct where it attaches to the dryer's exhaust port at the rear. Most connections use a clamp held by a single screw or a simple friction fit. Loosen the clamp, twist the duct slightly, and slide it off the exhaust port. Inspect the interior of the port opening and the first section of duct with a flashlight before reaching in. Compact dryers like the Magic Chef MCSDRY15W have very short duct runs, so the entire path is visible from this single access point.
Step 2: Vacuum the Duct and Dryer Exhaust
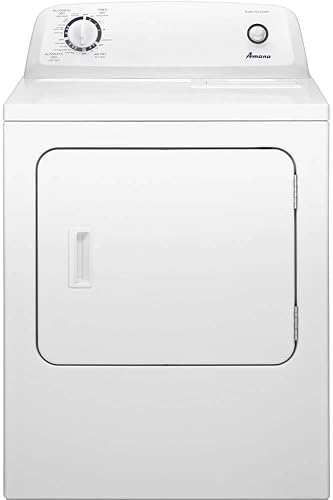
Insert the vacuum crevice tool into the exhaust port and the disconnected duct end to pull out loose lint within reach. Then thread the vent brush into the duct, rotating it as you push forward to loosen compacted material. Pull the brush back and vacuum again. Repeat several passes until no more lint comes out on the brush. For longer duct runs that go through a wall to an exterior location, work from both ends: brush from the dryer side, then repeat from the exterior vent cover side. The Amana NED4655EW at 6.5 cu ft has a standard rear exhaust port that is straightforward to disconnect and clean in under 20 minutes with the right brush kit.
Step 3: Clean the Outside Vent Cover
The exterior vent cover is the most overlooked part of the cleaning process. Go outside and locate the vent hood on the wall or, in some homes, on the roof. Remove any screws or latches holding the cover in place. Clear out lint from the flap mechanism, the hood opening, and the first few inches of the duct exposed from that end. Birds and small animals occasionally nest in vent openings, so check for debris beyond just lint. Use the brush from this end to push any remaining material back toward the interior where the vacuum can remove it. Reattach the cover securely. A loose cover flap that does not close fully between cycles allows cold air and pests into the duct.
Step 4: Reconnect and Test
Slide the duct back onto the dryer's exhaust port and tighten the clamp. Position the duct so it follows the most direct path to the exterior without sharp bends that create lint-trapping pockets. A 90-degree elbow is acceptable; a tight U-bend is not. Push the dryer back into position without crushing the duct against the wall. Plug in or restore the gas supply. Run a short cycle with a few damp towels and go outside to confirm that the vent flap opens and exhaust flows freely from the exterior cover. If the flap stays closed or barely opens, there may still be a restriction inside the duct that warrants a second pass with the brush kit.
How to Choose a Dryer That Is Easier to Clean
Duct length and configuration determine how much effort maintenance requires. Dryers positioned directly against an exterior wall have very short straight ducts that take minutes to clean. Dryers vented through interior walls to a rooftop or distant exterior wall have long runs with multiple bends that accumulate more lint and require more thorough cleaning. Compact models like the Costway VD-23598EP at 10-pound capacity and the Magic Chef MCSDRY1S at 2.6 cu ft typically occupy spaces with shorter vent paths, making annual maintenance quicker. The Kenmore 8.0 cu ft front-load gas dryer at $1,199.99 and 4.8 stars across 15 reviews is a larger unit, but its rear-exhaust port and reversible door are designed for straightforward installation in any standard laundry setup.
Frequently asked questions
How often should I clean my dryer vent?
Once a year is adequate for most households. If you regularly dry heavy loads like towels, bedding, or pet blankets, or if your household runs more than five loads per week, cleaning every six months is a reasonable target. Signs that a cleaning is overdue include noticeably longer drying times, the dryer exterior feeling unusually hot, or a faintly burning smell during a cycle.
Can I clean my dryer vent without removing the duct?
You can reach some lint without fully disconnecting, using a flexible brush through the exterior vent opening or a vacuum at the dryer's lint trap area. But fully disconnecting the duct allows thorough cleaning of the exhaust port and the duct interior from both ends. Partial cleaning leaves compacted lint deeper in the run that eventually becomes a restriction and fire risk.
What happens if I never clean my dryer vent?
Lint accumulates gradually until airflow is significantly restricted. The dryer runs longer and hotter, shortening the life of the heating element and thermostat. In severe cases, concentrated heat ignites the lint inside the duct. A neglected vent also channels warm humid air back into the wall cavity when the external path is blocked, which can promote mold growth in wall insulation.
Is it safe to use a leaf blower to clean a dryer vent?
Yes, from the exterior end. Direct the airflow into the exterior vent cover to push accumulated lint back through the duct toward the disconnected dryer end, where it can be vacuumed up. Do not blow air into the dryer's exhaust port with the machine connected. A leaf blower is particularly useful for long duct runs where the flexible brush kit cannot reach the full length.