How to Hook Up a Portable Washing Machine
Recommended picks

Choose the Right Location for Your Portable Washer
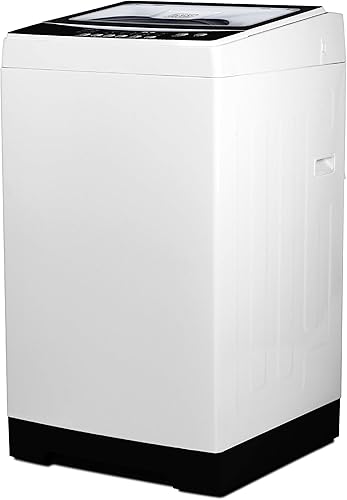
Start by selecting a location within reach of both a threaded faucet and a grounded electrical outlet. The floor should be level and solid; tile, hardwood, and sealed concrete all work well. Avoid carpet, which can absorb water from minor drips and create a mold problem. Measure the spot against the machine's footprint and leave a few extra inches behind it for the hoses. The Giantex EP21684 measures 15 by 24.8 by 28.5 inches; the Brand BPWM20W is 22.2 by 21.6 by 37.4 inches. Knowing which model you have before measuring prevents surprises. If you plan to roll the washer away after each use, confirm the path to the closet is wide enough and free of obstacles.
Gather the Necessary Tools and Parts
Most portable washers ship with a fill hose, a drain hose, and at least one faucet adapter. Some include multiple adapter sizes for different thread diameters. Before you start, lay everything out and confirm nothing is missing. You may also want an adjustable wrench or a pair of pliers, a small bucket or towel for any drips during connection, and plumber's tape if your faucet threads are slightly worn. Pull-out spray faucets may need a diverter valve, which you can find at any hardware store for a few dollars. The Comfee CLV09N1AMG, for example, ships with a quick-connect adapter sized for standard kitchen faucets, which simplifies the process considerably.
Attach the Faucet Adapter to the Sink
Unscrew and remove the existing aerator from the faucet tip, using a cloth to protect the finish if you need pliers. Screw the portable washer's adapter onto the exposed threads, turning clockwise by hand until snug. A gentle quarter-turn with a wrench is enough to create a seal; overtightening can strip the threads on either the faucet or the adapter. Some adapters include a diverter that lets you toggle between the faucet and the washer hose, which is convenient if you want to leave the adapter installed permanently. Test the seal by briefly opening the cold water fully and watching for drips at the connection point. Address any seeping with plumber's tape before proceeding.
Connect the Fill Hose to the Washer and Faucet
Attach one end of the fill hose to the water inlet fitting on the back of the washing machine. Hand-tighten the coupler and then snug it with pliers if needed, but stop well before it becomes difficult to turn. Rubber washers inside the coupler create the seal, not raw thread pressure. Attach the other end to the faucet adapter. Many hoses use a quick-connect design that clicks into place. For models like the Giantex EP23113, the inlet hose is color-coded blue to indicate cold-water connection. Confirm the hose runs without a sharp kink between the machine and the sink. Turn the water on all the way and check both connection points for dripping.
Position the Drain Hose Properly
The drain hose carries wastewater from the machine into the sink. Hook the hose's curved end over the inside edge of the sink basin and secure it with the included U-clip or a piece of sturdy tape. The hose end should sit at least 24 inches above floor level to prevent siphoning, which occurs when the weight of water in the hose pulls water back out of the drum. Avoid submerging the hose tip in standing water in the basin, as that also causes backflow. For machines like the Avanti CTW84X0W-IS where the drain hose is roughly three feet long, confirm the machine placement puts the sink within that reach. Some fully automatic portables have an internal pump that can push water up to a limited height, but gravity drainage is more reliable.
Plug In and Test the Machine
With both hoses connected and the drain hose secured, plug the washer's power cord directly into a grounded wall outlet. Do not use an extension cord; the electrical load and the presence of water make that a safety risk. Turn the faucet fully open, select a short cycle, and press start. Watch the fill process for the first minute or two to confirm water enters the drum steadily and neither hose connection drips. After the cycle finishes, check that the drain hose carries water into the sink cleanly and the basin does not back up. The Hamilton Beach HBPW3O2AMZ with its twelve-cycle selection is a good candidate for a test run on a quick or rinse-only setting first.
Adjust for Semi Automatic Washers
Semi-automatic twin-tub models, such as the Costway 24961-CYPE, involve a few extra steps compared to fully automatic machines. After the wash cycle finishes, you transfer wet clothes from the wash tub to the spin basket. The wash tub drains either through a manual outlet valve or through a separate drain hose connected to that side of the machine. Read the model's instructions to confirm the drain arrangement; some twin-tub models have two separate drain hoses, one for each compartment. The Zeny ZENYJA019042T follows this approach. The process is straightforward once you have done it a few times, but the initial setup is worth reviewing carefully to avoid flooding the area from the wrong drain point.
Troubleshoot Common Connection Issues
If water does not fill the drum after starting the machine, confirm the faucet is fully open and the inlet hose is not kinked. A partially closed aerator screen can restrict flow enough to trigger the machine's low-pressure cutoff. If the machine fills but does not drain, check that the drain hose is not clogged with lint, that the end sits no higher than the machine's specified maximum drain height, and that the hose is not submerged in the sink basin. The Pyle PUCWM11 specifies a maximum drain hose height of three feet. Leaks at the faucet adapter most often come from a damaged rubber washer inside the coupler; replace it with a standard garden hose washer from any hardware store. Excessive vibration during the spin cycle usually means the load is unbalanced; redistribute the clothes and restart.
Store Your Portable Washer Properly Between Uses
After each use, turn off the faucet and let the machine run through any remaining water in the drum or hoses. Disconnect the fill hose from the adapter and drain any water out of it by holding it below the sink level. Wipe the drum interior with a dry cloth to prevent mildew, and leave the lid open for an hour or two before storing. Coil both hoses loosely and store them inside the drum or in a nearby cabinet. If you have a compact unit like the Costway FP11048US with casters, roll it to its storage spot and leave the faucet adapter attached to the faucet for convenience on the next laundry day. Running a cleaning cycle with diluted white vinegar every couple of months removes mineral deposits from the drum and pump.
Common mistakes to avoid
- Trying to attach the adapter without first removing the existing aerator, which results in a poor seal and dripping at the faucet.
- Plugging into an ungrounded outlet or using an extension cord, which introduces electrical risk in a water-adjacent setup.
- Letting the drain hose end hang lower than 24 inches above the floor, which creates a siphon that pulls water out of the drum mid-cycle.
- Overtightening the hose couplers with a wrench, stripping the threads on the inlet port or the faucet adapter.
- Starting the machine and walking away without watching the first fill cycle, missing a slow drip that could cause floor damage.
Frequently asked questions
Can I hook up a portable washing machine to any sink?
Most portable washers connect to any sink with a threaded aerator. Standard kitchen faucets work well. Bathroom faucets are often smaller and may need a different adapter size, but most washers include adapters for both. Pull-out spray faucets require a diverter valve to redirect water to the washer hose.
Do I need a special electrical outlet for a portable washer?
No. Portable washers plug into a standard 120V grounded outlet, the same type used by most household appliances. Avoid extension cords and ensure the outlet is grounded. Larger models like the Brand BPWM20W draw more current but still use a standard plug.
How do I prevent the drain hose from slipping out of the sink?
Use the U-shaped clip most portable washers include in the box. It hooks over the sink edge and holds the hose in position during the drain cycle. If yours did not include a clip, a rubber band looped around the faucet handle or a binder clip on the sink edge works in a pinch.
What should I do if water leaks from the faucet connection?
First, hand-tighten the adapter and check for obvious gaps. If it still drips, remove the adapter, wrap two or three turns of plumber's tape clockwise around the threads, and reinstall. If the rubber washer inside the coupler looks flat or cracked, replace it with a standard garden hose washer.
Can I leave the hoses attached to the faucet when not in use?
You can leave the faucet adapter installed permanently, which saves a step each laundry day. Disconnect the fill hose from the adapter after each use and store it dry to prevent mold inside the hose. Always turn the faucet off when the machine is not running.